To complete this process, you must have admin privileges on the device.
Step 1. Download installation & onboarding packages
- In Microsoft 365 Defender portal, go to Settings > Endpoints > Device management > Onboarding.
- In Section 1 of the page, set operating system to macOS and Deployment method to Local script.
- In Section 2 of the page, select Download installation package. Save it as wdav.pkg to a local directory.
- In Section 2 of the page, select Download onboarding package. Save it as WindowsDefenderATPOnboardingPackage.zip to the same directory.
- From a command prompt, verify that you have the two files.
Step 2. Install Microsoft Defender
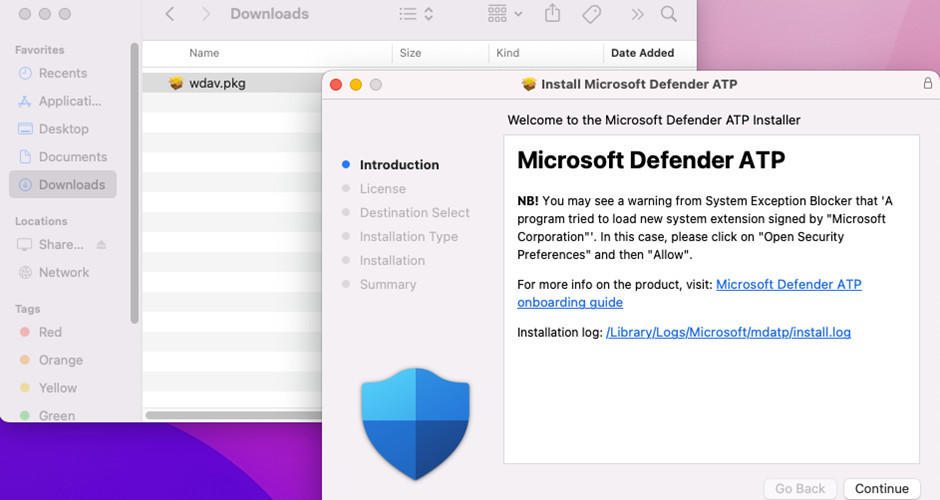
- Navigate to the downloaded wdav.pkg in Finder and open it.
- Select Continue, agree with the License terms, and enter the password when prompted.
- At the end of the installation process, you’ll be prompted to approve the system extensions used by the product. Select Open Security Preferences.
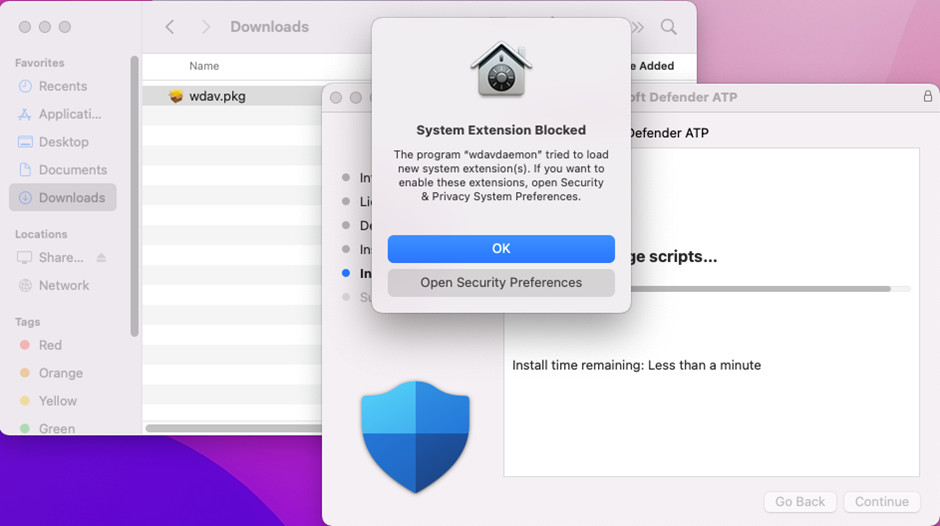
- From the Security & Privacy window, select Allow.
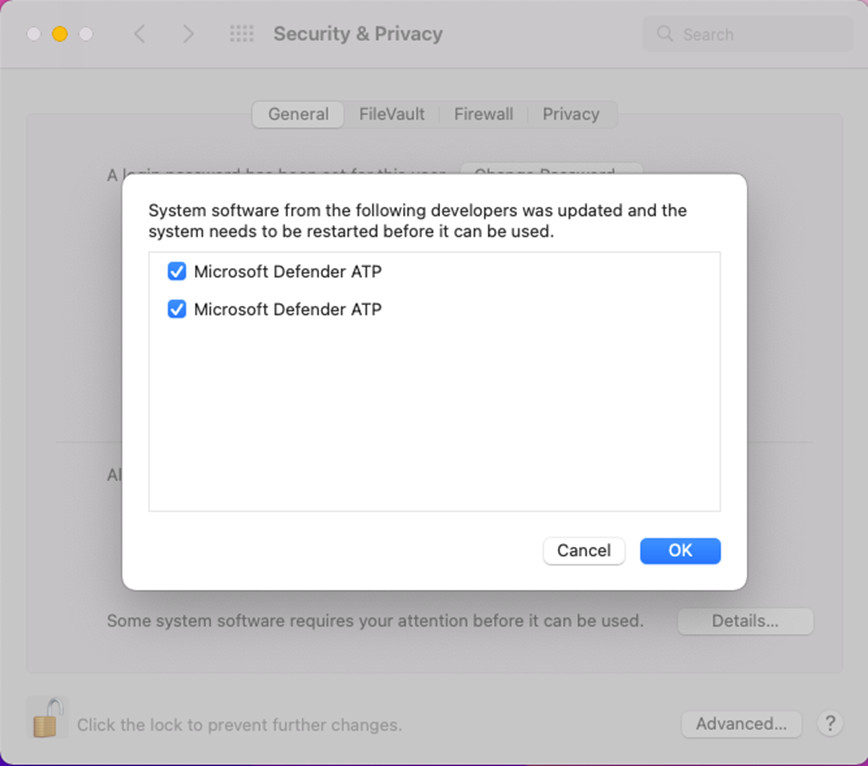
- Repeat the last two security actions again for all system extensions distributed with Microsoft Defender for Endpoint on Mac.
- As part of the Endpoint Detection and Response capabilities, Microsoft Defender for Endpoint on Mac inspects socket traffic and reports this information to the Microsoft 365 Defender portal. When prompted to grant Microsoft Defender for Endpoint permissions to filter network traffic, select Allow.

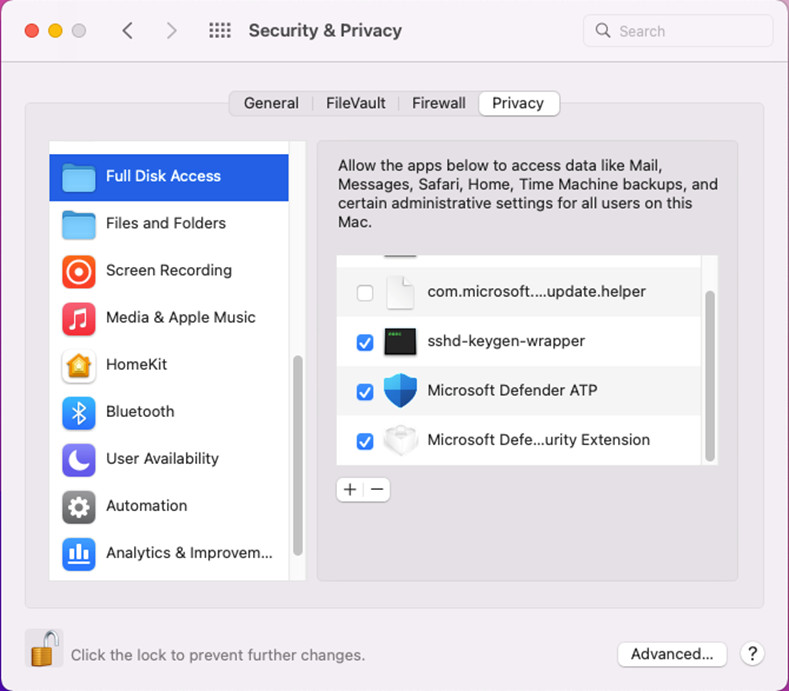
- Open System Preferences > Security & Privacy and navigate to the Privacy tab. Grant Full Disk Access permission to Microsoft Defender and Microsoft Defenders Endpoint Security Extension.
Client Configuration
- Copy wdav.pkg and MicrosoftDefenderATPOnboardingMacOs.sh to the device where you deploy Microsoft Defender for Endpoint on macOS.
The client device isn’t associated with org_id. Note that the org_id attribute is blank.
mdatp health --field org_id
- Run the Bash script to install the configuration file:
Sudo bash -x MicrosoftDefenderATPOnboardingMacOs.sh
- Verify that the device is now associated with your organization and reports a valid org ID:
mdatp health --field org_id
After installation, you’ll see the Microsoft Defender icon in the macOS status bar in the top-right corner.

How to Allow Full Disk Access
- To grant consent, open System Preferences > Security & Privacy > Privacy > Full Disk Access. Click the lock icon to make changes (bottom of the dialog box). Select Microsoft Defender for Endpoint.
- Run an AV detection test to verify that the device is properly onboarded and reporting to the service. Perform the following steps on the newly onboarded device:
- Ensure that real-time protection is enabled (denoted by a result of 1 from running the following command):
mdatp health --field real_time_protection_enabled
- Open a Terminal window. Copy and execute the following command:
curl -o ~/Downloads/eicar.com.txt https://www.eicar.org/download/eicar.com.txt
- The file should have been quarantined by Defender for Endpoint on Mac. Use the following command to list all the detected threats:
mdatp threat list
- Run an EDR detection test to verify that the device is properly onboarded and reporting to the service. Perform the following steps on the newly onboarded device:
- In your browser such as Microsoft Edge for Mac or Safari.
- Download MDATP MacOS DIY.zip from https://aka.ms/mdatpmacosdiy and extract.
You may be prompted:
Do you want to allow downloads on “mdatpclientanalyzer.blob.core.windows.net”?
You can change which websites can download files in Websites Preferences.
- Click Allow.
- Open Downloads.
- You should see MDATP MacOS DIY.
If you double-click, you will get the following message:
“MDATP MacOS DIY” cannot be opened because the developer cannot be verifier.
macOS cannot verify that this app is free from malware.
[Move to Trash] [Cancel]
- Click Cancel.
- Right-click MDATP MacOS DIY, and then click Open.
The system should display the following message:
macOS cannot verify the developer of MDATP MacOS DIY. Are you sure you want to open it?
By opening this app, you will be overriding system security which can expose your computer and personal information to malware that may harm your Mac or compromise your privacy.
- Click Open.
The system should display the following message:
Microsoft Defender for Endpoint – macOS EDR DIY test file
Corresponding alert will be available in the MDATP portal.
- Click Open.
In a few minutes an alert named “macOS EDR Test Alert” should be raised.
- Go to Microsoft 365 Defender portal (https://security.microsoft.com/).
- Go to the Alert Queue
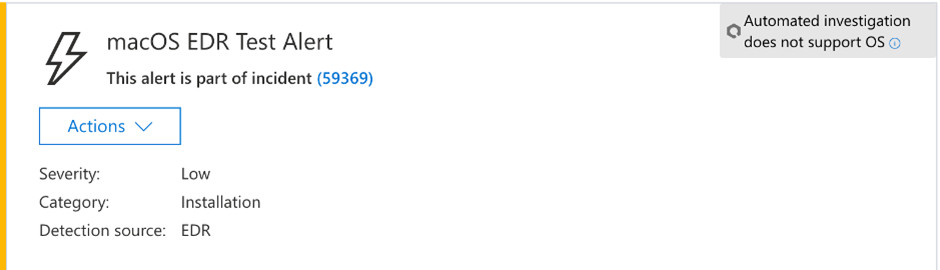
Look at the alert details and the device timeline and perform the regular investigation steps.